Sunday, November 30, 2014

The Secret to Soup: Chicken Tortilla

Broth-based soups are kinda like liquid casseroles--use what you have and let the flavors mingle.  If you like all of the ingredients you're adding in to the broth and could see yourself eating them in some other dish then you should be safe!

I usually start with chicken broth as my base.  (The carton of it is ideal, about four cups?)  Get that simmering on the stovetop at medium heat.  At this point you'll need to pick a flavor direction.  Today we'll focus on:  

Mexican (My fave!)


For chicken tortilla soup use:
-shredded, cooked chicken breast (2-3 breasts or half of a rotisserie chicken)
-a pinch or two of chili powder (preferably homemade for more flavor) or spices like cumin
-salt and pepper to taste (a few cracks on the grinder will do)
-canned, rinsed beans, if you're into that (pinto or black)
-tomatoes

Start with the broth and spices and add the meat and beans a little later to reheat them.  I like to reduce the heat to low or low/medium at the hottest once the broth starts to boil.  I usually let it cook for 20-30 minutes so the flavors mix well.  At about 10 minutes in I add the beans, followed by the cooked meat, and then I dice the tomato and add that so it's not completely soft by the time I eat it.

While it's cooking, prep the toppings:
-cilantro
-cheese
-avocado, cubed or sliced 
-crumbled tortilla chips

A variation of this is to use ground beef instead of chicken:


A lot of restaurants use rice as well but a warning on using rice or pasta:  it will continue to cook in the hot soup.  See this one I made recently with little stars?


The stars got bigger and softer as they absorbed the broth.  Not only did they get mushy but I also lost most of my broth to the ever-growing stars!  I prefer soups without rice or pasta, but if you choose to add them do it closer to the end than the beginning.  When it's still kinda chewy it's time to pull it off the heat because it's not done cooking!  You could use cut up corn tortillas instead but I've always served this with the tortillas in chip form.

Throughout the winter we'll talk about some other broth-based soups and move into cream-based ones.  Find yourself a good pot with a lid (I love a good Dutch oven!) and let's make some soup!

Adi

Wednesday, November 26, 2014

Now that life has calmed down a bit...

The posts were steadily coming along at the beginning of the year.  Then, this happened:


So this happened:


And the remodel of a nearly thirty year old Victorian dollhouse occupied most of my time, as did the moving and the selling and, oh yeah, the working and the living and such.  Now that it's Thanksgiving break and my life feels like it's calming down a little I'm turning back to the old blog.  I've missed it!

You can see that the format has changed a little.  It's now much simpler and hopefully more mobile-friendly.  I've also added a Pin It button!  (That's huge for me because I couldn't figure out how for the longest time.)  If you hover over any picture you'll see the Pinterest emblem in the lower left corner (or click on the picture on your phone or tablet).  Now you'll have a quick way to file those craft ideas and recipes!

I'm planning to keep the same format as earlier this year:  food ideas on Sundays, home and/or crafts on Wednesdays.  I may add more themed days later but let's not get too crazy, haha!

Happy Turkey Day! 
(I'm thankful for YOU!)

Adi

Sunday, February 16, 2014

Minecraft Creeper Cake (and a Pin-fail)

I was recently asked to make Minecraft cupcakes or cookies for a friend's birthday.  Knowing how pixelated the game is I wanted to make square cupcakes and I thought back to an idea I had seen on Pinterest for using a 9x13" baking dish to achieve this.  So, following the directions, I set it up like this:


In theory, the cakes should be square as they press together and rise.  I tried the pinch the sides as much as I could but the wet cake batter had other ideas.  Hoping for the best, I baked the cupcakes for a little longer than usual (more like a cake, since there was no space in between the cupcakes for the heat to circulate).  As you can probably guess, here's what I got when I opened the oven door:


Um, not quite what I was going for. 

Determined to make the best of it and let no cake go to waste I removed the cupcakes, let them cool, and reassembled my jigsaw puzzle cake and iced over the top in the style of a pull-apart cake:


Going back to the pixelated nature of Minecraft I used Wilton's Sugar Sheets (thin, edible fondant sheets) in black, dark green, and light green. 


I used a pastry wheel and cut the green sheets into small, half-inch squares.  The patterns in the game are not an exact checkered scheme but more of a randomized placement of pixels.  It kinda bugs me to do it that way (I like for things to be even!) but that's Minecraft and I was going for authenticity.


Consulting Google images for Minecraft (and I chose the Creeper because that was the most common image I saw) I got an idea of how large the black portions should be (about 2:1 black to green) and placed the black pieces just so:


Scary or something!  Hahaha, shows how much I know about Minecraft.  The ones I know who are more familiar with Minecraft got a kick out of it so I'll call it a win (or a salvaged Pin-fail!).

Adi

Thursday, February 13, 2014

Valentine garland

Need a quick, last-minute Valentine decor idea?  Make some simple Valentine garland.  


You'll need ribbon, scissors, craft pom pons, and a hot glue gun.  (I used ricrac.)  Cut the ribbon into the desired lengths--it could go in a doorway, a window, or be draped around a room.  Space them evenly and glue them to the ribbon.  


Once they've set they are ready to grace your home/office/classroom...just think of all the places you can use them!  (You can use different colors for different holidays...so many possibilities!!)

Adi


Sunday, February 9, 2014

Salmon with Bacon-Wrapped Asparagus

Bacon-wrapped asparagus.  Don't your eyes just go right past the salmon to the bacon part of that title?  Mmmmm....bacon.....

This meal will make a nice Valentine's meal if you prefer to stay in instead of fighting the restaurant crowds that night.  We always do a home-cooked meal--it's my gift to Adam each Valentine's Day.  This combo is good for you (mostly) and is elegant but secretly simple to make.  Start by wrapping bacon strips to freshly-washed asparagus and set your burner to medium-high heat. 


Carefully move the wrapped stalks to the pan.  (I cooked four at a time.)  Cook and check for proper browning, then flip as needed until all sides are browned.


Meanwhile, in a 350 degree oven, get ready to bake your family-sized portion of fresh salmon.  As you unfold the fish that was deceptively folded in in the package tell yourself that it's okay to slice it in half and divide it among two baking pans.  Cover with lemon-pepper seasoning and slices of lemon.  Bake for 20-25 minutes until it's nice and flaky.


Plate it up and there you have it:  an elegant dinner for two (with enough fish to feed the 5,000....but I digress...). 


Adi

Wednesday, February 5, 2014

Sketch Crawl

On a recent BEAUTIFUL Saturday I went to my first Sketch Crawl in downtown Fort Worth.  In case you don't know what that is, picture a bunch of people scattering around town, drawing or painting for two hours, and meeting up again to admire each other's work.

My sister came with me and we were joined later by Heather and Bear.  Emily wanted to sketch the Flatiron building so we trekked across town and set up our supplies so we could get to work.  


I decided to force myself out of my comfort zone (the ability to erase!) and sketch in pen.  I'd picked up some waterproof pens and mixed media paper that morning because I wasn't sure if I'd be sketching or painting.  

The Flatiron was sketched:

  
The pretty church whose name I forgot to check got sketched AND water colored: 


When it was time to meet up at the Plaza we all set out our pieces and admired the unique views of town.  


We had such a great time!  Come join us on the last Saturday of the month.  The Sketchers meet at the new Plaza on Main at 2:30 in the afternoon.


Adi

Sunday, February 2, 2014

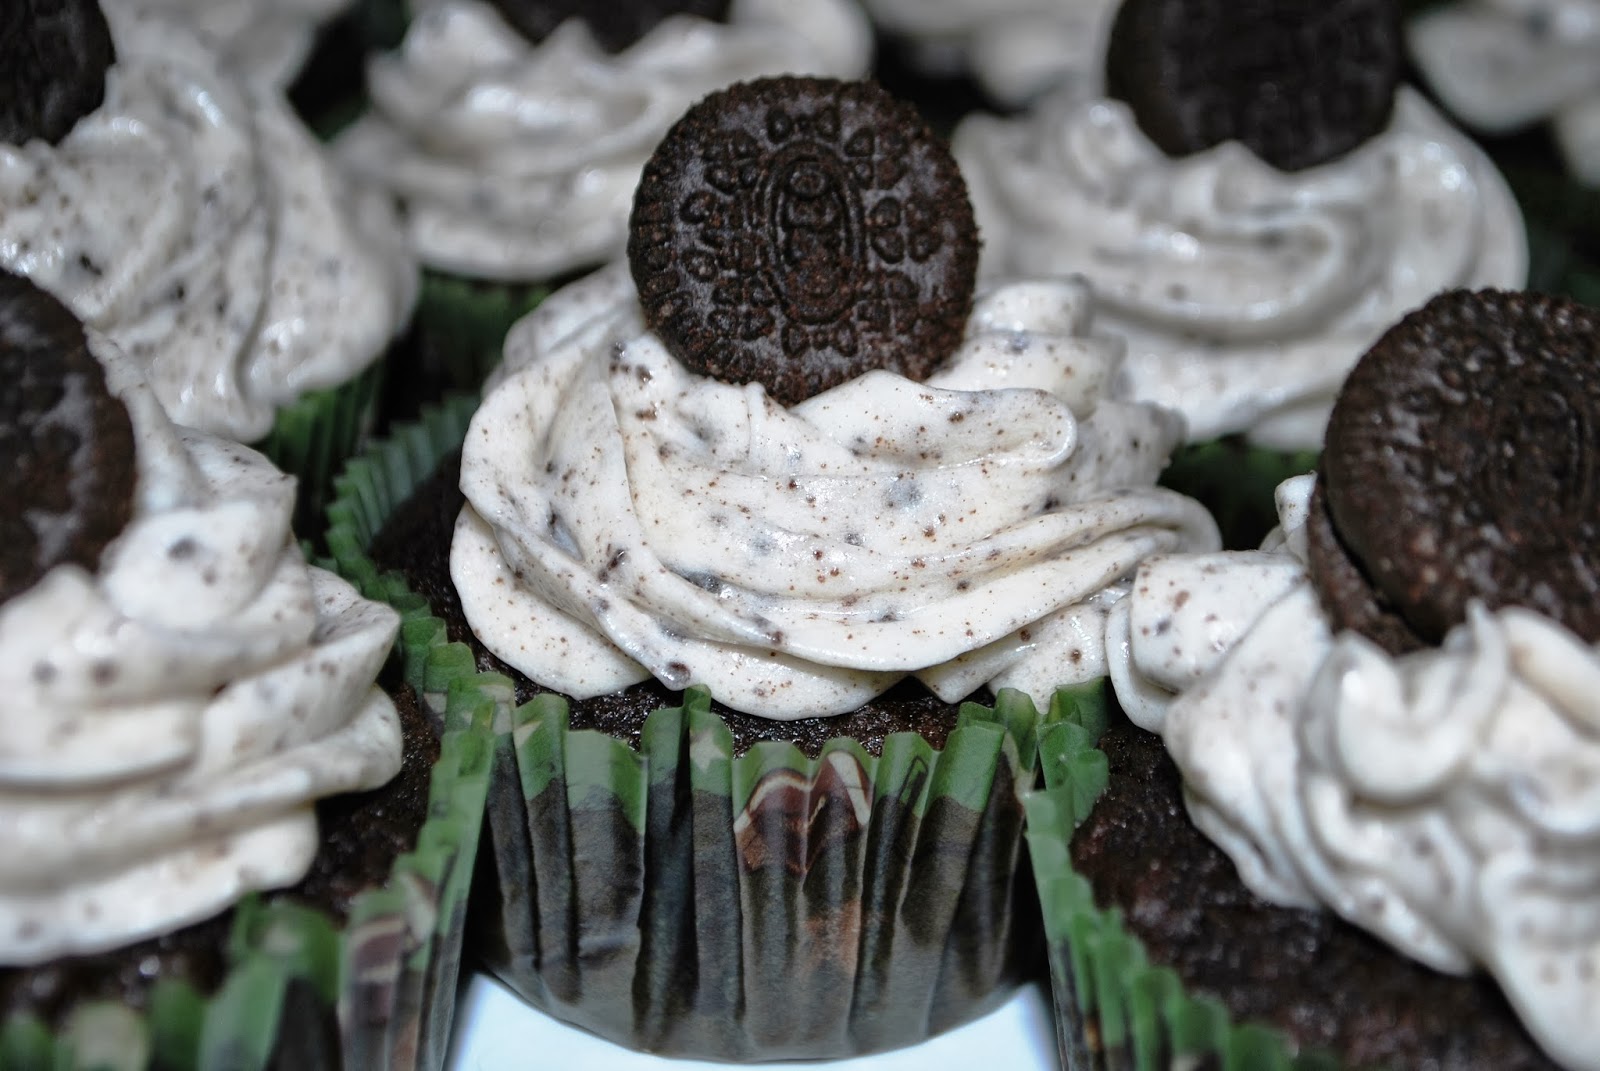
Oreo Cupcakes

My little sister told me about some cupcakes that were recently in the teachers' lounge at her school.  She called them Oreo cupcakes and said they reminded her of the fried Oreos at the state fair.  Since I needed something to take to a Super Bowl party today I decided it was a good time to try them out.  I found this recipe on Pinterest (of course!) and while I feel like a traitor for using a boxed cake mix I didn't want to mess with the recipe the first time I made it.  I think it's a hit, so here's how you do it!

Start by assembling the cake ingredients:


Make the mix according to package directions (that's what the water, oil, and eggs are for) but don't bake it!  Place an Oreo in the bottom of each cupcake wrapper (football-themed, duh!):


This made 30 cupcakes since you're using a little less cake batter per cupcake with a whole Oreo in there.  Use the rest of the Oreos in the package to crush up and mix with the batter, like so:


Grrrrrr!  A great way to make your meat tenderizer a multi-tasker (but you can use a rolling pin or your food processer, too).


Fill the cupcake liners about 3/4 of the way up.  Bake at 350 degrees for 15 minutes.  Let them cool while you make the frosting.

For the frosting, you'll need an 8oz. block of (room temperature) cream cheese, a stick of (room temperature) butter, a bag of mini Oreos, vanilla extract, and powdered sugar.  Cream together a stick of butter and a block of cream cheese.


Add a teaspoon of vanilla extract and 3 3/4 cups of powdered sugar.  Mix until it's combined and fluffy (a technical term, haha). 


Fetch your bag of Oreos and discover that your husband has already found them.  With the half bag that remains, set aside as many non-broken cookies as you can find--these will top the finished cupcakes.  Finely chop the rest of the cookies and add them to the frosting.


Now it's time to assemble the cupcakes!  Fit a piping bag with a wide tip.  This is important because there will inevitably be pieces of cookie that didn't break down as much as you thought.  Keep a small knife handy to break up pieces that get stuck in the end of the tip as you frost the cupcakes.  (If this sounds like too much of a hassle you could just frost them with a spatula or butter knife!)  Top each cupcake with a mini Oreo.


Take a look at the inside:


Enough with the pictures.  Time to dig in!


Enjoy!
Adi