I'm taking a break from the sugary posts to bring you several projects I recently made. I've been pinning ideas since December and it finally hit me that I need to try some of this stuff! In my browsing of ideas I came across the blog of a really cute college girl at A&M who just so happens to be 5'9" and loves to sew, which means that all of her patterns will automatically fit me! Check out her blog here.
The first thing I made was this shirt:
Her pattern called for a knit fabric but I had a large portion of this sitting around. If you decide to use something than other than knit you'll want to make sure you hem up the sides first so they don't fray. I followed her directions blindly until I tried it on and realized the edges around the armholes would be raw.
The second thing I made was not a pattern but more of an easy old stand-by for summer:
This was an impulse buy when I was at Joann's looking for another project. I liked how long the material was, especially since most of the pre-smocked fabrics are designed for little girls and wouldn't make it to my waist much less my calves! The polka dot print is so fun and I love these colors together.
The final project has affectionately been named the "Grecian Goddess" by a few of my coworkers:
Here is where the part about the girl being 5'9" comes in handy! I can't remember the last time I tripped over a dress. I left it too long on purpose just because I could! If you can sew in a straight line you can sew this dress--it is that easy! It's a compliment-getter and super-fast to make...give it a try if you're feeling crafty. (And then do a "walk the runway" shot using your sidewalk like it appears I was doing. That picture turned out funnier than I intended!)
Happy sewing!
Adi
The sweets, treats, and creations of a girl who never outgrew her imagination
Wednesday, April 25, 2012
Saturday, March 24, 2012
Sorin's Football Cake
This little cake started off as cupcakes, then turned into a pull-apart cupcake cake, and finally transitioned into what you see below:
I was excited to have an excuse to make grass! I've always thought this was the coolest technique. Through this cake I learned that grass + gravity are not a good combination. I guess there's not enough surface area for the little bits of grass to stick to and not fall off the cake. Instead I just made the sides green to match and piped little sprouts of grass in the corners of the base and stars to match the ones on top around the rest of the base. I made the lacing more toward the top of the cake to leave some room for the message.
The inside of the cake is a two-layer chocolate cake (that really moist version that I use for cupcakes works for a full-size cake too, I am happy to report!) with a layer of buttercream icing between them. The football on top is chocolate, too.
Happy birthday Sorin!
I was excited to have an excuse to make grass! I've always thought this was the coolest technique. Through this cake I learned that grass + gravity are not a good combination. I guess there's not enough surface area for the little bits of grass to stick to and not fall off the cake. Instead I just made the sides green to match and piped little sprouts of grass in the corners of the base and stars to match the ones on top around the rest of the base. I made the lacing more toward the top of the cake to leave some room for the message.
The inside of the cake is a two-layer chocolate cake (that really moist version that I use for cupcakes works for a full-size cake too, I am happy to report!) with a layer of buttercream icing between them. The football on top is chocolate, too.
Happy birthday Sorin!
Wednesday, March 14, 2012
Baby shower cake for Adelaide
Thanks to my awesome office mate, Cyndi, I got to make a baby shower cake for soon-to-arrive baby girl named Adelaide. I combined a picture of her quilt
with the doodle-y flowers from the invitations to make this:
The cake was a butter cake recipe with my go-to icing. My favorite part is the bird flying by with the "Welcome Adelaide" banner. The cake was whimsical and fun. Best wishes to Adelaide and her family!
with the doodle-y flowers from the invitations to make this:
The cake was a butter cake recipe with my go-to icing. My favorite part is the bird flying by with the "Welcome Adelaide" banner. The cake was whimsical and fun. Best wishes to Adelaide and her family!
Monday, January 30, 2012
Wednesday, January 25, 2012
The Next Big Thing
La de da, grad school's over, lots of spare time...for me to get lazy. Funny how having MORE time makes me LESS productive. Combine wanting to relax after 3.5 years of school with my newfound love for Pinterest and I was quickly turning into a couch potato. I've enjoyed discovering a few new blogs, too (shout out to http://abeautifulmess.typepad.com/). I like to read leadership articles and blogs like the now-business-savvy girl I am and the theme for this new year seems to universally be "stop talking about doing something and actually go for it!" I've talked about starting my own business for a long time and have flip-flopped between opening a bakery or a scrapbooking retreat. Upon discovering the Texas Cottage Foods Law (letting bakers sell goods out of their homes!) and realizing that I do not have the kind of startup money needed for a scrapbook retreat it seemed like the bakery was the way to go.
Thus, Sweet Creations by Adi was born.

I'd noticed around Christmas that on more than one occasion when I handed people their gifts they responded with "is it cookies?!" I've also noticed my cookies do really well at bake sales. With virtually no startup costs and an aresnal of delicious cookie recipes I decided it was time to do this. I filed for my DBA (Doing Business As or "assumed name") last week so the name is official. I've calculated ingredient costs and I'm working on pricing as well as a facebook page (which you should go right now and like: Sweet Creations by Adi's Facebook page). I've still got a little bit of research to do on taxes and fun stuff like that but pretty soon I hope to announce that this sweet little business is up and running. I'll keep you posted!
Adi
Thus, Sweet Creations by Adi was born.
I'd noticed around Christmas that on more than one occasion when I handed people their gifts they responded with "is it cookies?!" I've also noticed my cookies do really well at bake sales. With virtually no startup costs and an aresnal of delicious cookie recipes I decided it was time to do this. I filed for my DBA (Doing Business As or "assumed name") last week so the name is official. I've calculated ingredient costs and I'm working on pricing as well as a facebook page (which you should go right now and like: Sweet Creations by Adi's Facebook page). I've still got a little bit of research to do on taxes and fun stuff like that but pretty soon I hope to announce that this sweet little business is up and running. I'll keep you posted!
Adi
Thursday, December 22, 2011
Yarn-Wrapped Monogram (crochet version)
Oh, Pinterest, how I love you and your plethora of ideas. I finally joined after I turned in my last final (my bribe for focusing one last time on schoolwork!) and it's been hours of idea-gathering. As you can see from the number of recent blog posts I've had some extra time on my hands and I've apparently been making up for lost time by trying out all these new ideas. In this post I'll share with you how I tweaked the yarn-wrapped letters I saw here.
Yarn-wrapped letters are nothing new. I first noticed them in Austin when I walked down South Congress (my favorite part of the city!). There's a cute little coffee shack called Jo's--clever, I know-- that has letters on their sign wrapped in sweaters!
I bought a paper-mache letter A at Joann's and started to wrap it in yarn until I got the idea to go one better. Inspired by the sign in Austin I decided to make a crocheted monogram. You'll need these supplies plus a hot glue gun:
That's a huge amount of crocheted chain. You'll need a lot before you get started. I guess the easiest way to walk you through this is to let my pictures do the talking. Just remember to glue where you need to and make one side the "pretty side." Also, don't forget about the top, bottom, and the weird nooks and crannies specific to your monogram.
(Hey! These two are a very important part of the crafting process!)
The finished product! The light spots aren't so bold in person but I like that they provide some contrast so you can see through the stitches that this is crocheted.
Yarn-wrapped letters are nothing new. I first noticed them in Austin when I walked down South Congress (my favorite part of the city!). There's a cute little coffee shack called Jo's--clever, I know-- that has letters on their sign wrapped in sweaters!
I bought a paper-mache letter A at Joann's and started to wrap it in yarn until I got the idea to go one better. Inspired by the sign in Austin I decided to make a crocheted monogram. You'll need these supplies plus a hot glue gun:
(Hey! These two are a very important part of the crafting process!)
The finished product! The light spots aren't so bold in person but I like that they provide some contrast so you can see through the stitches that this is crocheted.
Tuesday, December 20, 2011
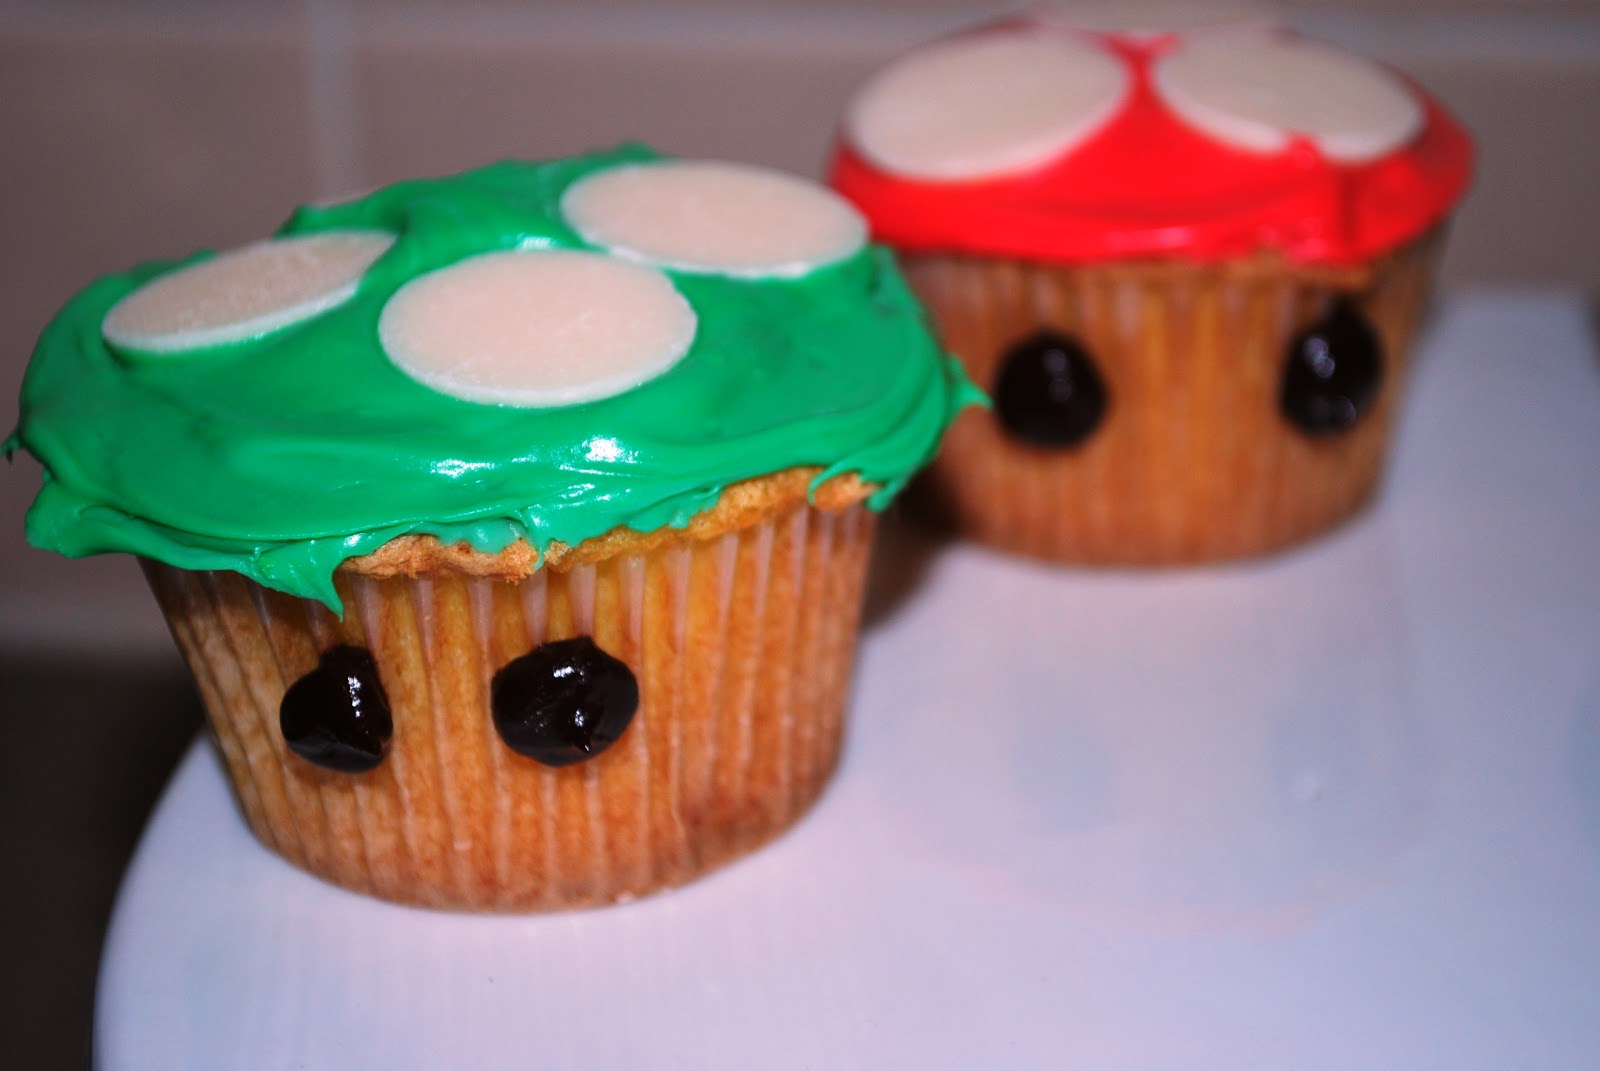
Super Mario Mushroom Cupcakes
No, those aren't "Super Mario Mushroom-Flavored Cupcakes" (thank goodness!). I made these for the birthday celebration of Adam's best friend Devlin. Devlin turned 30 today and decided to celebrate by going back to his gaming roots. His quest took him from the original Nintendo through Super Nintendo up through Sega Genesis, which is where he's currently playing before he moves a little further into the 1990's. As he played this morning he mentioned to his wife, Laura, that it would be cool to have cupcakes that looked like the little mushroom in the Mario series. She passed this idea along to me and the mushroom cupcakes were started.

To be fair, I Googled "Mario Mushroom Cupcake" to get an idea of how to proceed and got some good visual aids. I wanted to make both the red and green mushrooms (since the 1-Up mushroom is the greatest of them all) and could have *sworn* I'd seen green and red tubs of frosting in the stores in the Christmas baking displays. I have the hardest time coloring icing to be really dark, bold colors and wanted to cheat with something that was already colored for me, especially with my time crunch. Instead I found cherry-flavored icing (pink) and Christmas sprinkle icing (light green) so I made those darker instead of starting from scratch. I used a boxed mix that appeared to be really nice but instead turned out really flat. The cupcakes were probably the lightest and fluffiest I've made but I really needed something that would puff up! Eh, at least they tasted good and looked cute.
Their eyes are made from chocolate squares that I melted down and piped on. The white circles on top are Wilton's candy melts (in their unmelted form), which just so happened to be part of a recent Christmas gift from Garrett and Amanda (thanks guys!). After packing up the cupcakes (and maybe sampling a little along the way) I saved one to put in another of my Christmas gifts: a single-serving cupcake display from one of my coworkers, Amanda. So pretty and whimsical all in one!
We're still waiting to see if anything happens if you eat the cupcakes. If I see anyone gain an extra life or suddenly double in size I'll let you know.
Adi
To be fair, I Googled "Mario Mushroom Cupcake" to get an idea of how to proceed and got some good visual aids. I wanted to make both the red and green mushrooms (since the 1-Up mushroom is the greatest of them all) and could have *sworn* I'd seen green and red tubs of frosting in the stores in the Christmas baking displays. I have the hardest time coloring icing to be really dark, bold colors and wanted to cheat with something that was already colored for me, especially with my time crunch. Instead I found cherry-flavored icing (pink) and Christmas sprinkle icing (light green) so I made those darker instead of starting from scratch. I used a boxed mix that appeared to be really nice but instead turned out really flat. The cupcakes were probably the lightest and fluffiest I've made but I really needed something that would puff up! Eh, at least they tasted good and looked cute.
Their eyes are made from chocolate squares that I melted down and piped on. The white circles on top are Wilton's candy melts (in their unmelted form), which just so happened to be part of a recent Christmas gift from Garrett and Amanda (thanks guys!). After packing up the cupcakes (and maybe sampling a little along the way) I saved one to put in another of my Christmas gifts: a single-serving cupcake display from one of my coworkers, Amanda. So pretty and whimsical all in one!
We're still waiting to see if anything happens if you eat the cupcakes. If I see anyone gain an extra life or suddenly double in size I'll let you know.
Adi
Subscribe to:
Posts (Atom)