Wednesday, December 24, 2014

Merry Victorian Christmas!

I think this post is best said through pictures.  Have a very merry Christmas!


Adi


Sunday, December 21, 2014

Coconut Cream Pie

Oh my goodness I love this stuff! 


It seems I find more people who are anti-coconut than for it so I don't make it often but I made a double batch yesterday for some events this evening.  I use the recipe from the kitchen bible, aka the red and white checkered Better Homes and Gardens cookbook.  I have the 75th anniversary edition and it has the neatest feature in the back of "top recipes through the decades."  The pie is a staple of the book, though, so it should be in any version you pick up.

I made a double batch and chose a pot that was WAY too big but I'm here to tell you that you CAN successfully double it (though I'll just go over the instructions for a single pie).  I made a big ol' mess!


Start by separating four eggs.  I usually do this in one of my Pyrex measuring cups (those glass ones with the little spout and the handle).  We'll be working with the yolks on this one--save the egg whites for an omelet.   Break up the yolks with a fork and set the eggs aside.  Mix 3/4 cup of sugar and 1/4 cup of cornstarch in a pot and slowly add in 2 1/2 cups half and half (or milk).  Cook it over medium-high heat and keep stirring it for a while until it starts to thicken and bubble. 


It's important to keep stirring the mixture because otherwise a sludge will form on the bottom of the pan. 


Thanks a lot, cornstarch!

You'll reduce the heat at this point (I brought it down to medium) and continue to cook-and-stir for two more minutes.  Pull it off of the heat--I use another burner--and scoop out a cup of the hot stuff to mix with your egg yolks. 


Slowly pour the hot mix into the eggs while stirring so we can temper the eggs and start to raise the temperature.  Once you've mixed the cup of hot mix and the egg yolks you'll pour it BACK into the pot, stirring constantly so you don't end up with scrambled eggs! 


(A side note:  There are several cream pies you can make off of this recipe, and in some of the others it is VERY noticeable if you have egg chunks in your pie filling.  Because we're mixing in coconut this recipe is very beginner-friendly because even if you don't do a great job of incorporating the eggs the chunks won't be very noticeable because there's already other stuff in the cream!  There...I should now be done using the word "chunks"...how unappetizing!) 

Put the pot back onto the hot burner (about this time I kick up the heat just a smidge) and keep stirring until you reach the "gentle boil" stage.  Again, reduce the heat back to medium and do the cook-and-stir for two more minutes.  Turn off the heat, move the pan to a cooler spot, and add a tablespoon of butter and 1 1/2 teaspoons of vanilla and mix it up.  At this point we go in the coconut direction (otherwise, it's just a vanilla cream pie).  Add in a cup of shredded coconut and stir to thoroughly combine.  Pour the mix into your prepared pie plates.  (I don't like regular crust so I cheat and use the stuff that the Keebler elves make.)


Let it cool on the counter until it's safe enough to put into the fridge to cool all the way--I think I let mine sit about 45 minutes, mostly because I got distracted with other chores.  When you're putting the pie into the fridge it's a good time to also put in your mixing bowl and whisk attachment.

Since I come from a whipped cream kind of family (
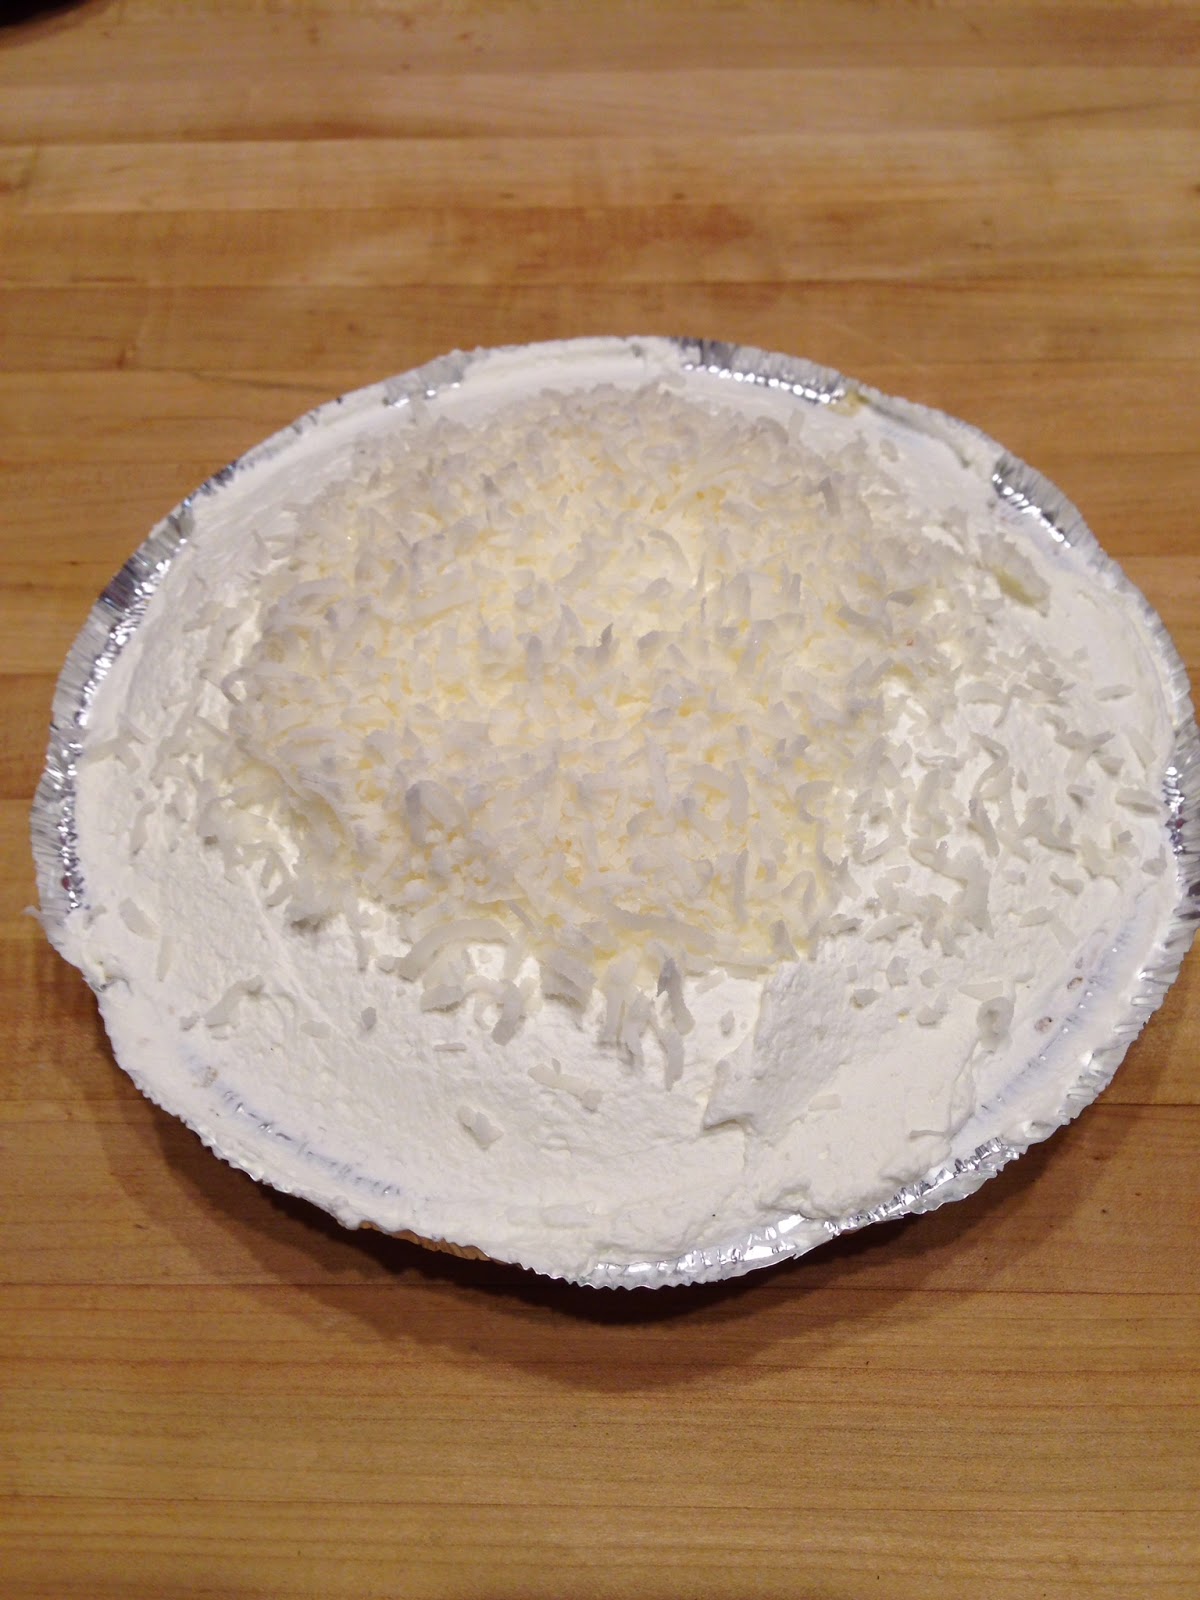
we are NOT a meringue bunch) I add whipped cream to my pies once they have cooled.  Pull out the chilled bowl and whisk and add a cup of heavy whipping cream.  I set my mixer on the second-highest setting and let it do its thing until it starts to get thicker.  Once it gets pretty thick I add a spoonful to maybe two spoonsful of regular sugar and continue to mix.  Once it starts to look nice and thick stop the mixer and taste test it with a spoon (because that's cleaner than your finger, of course).  If all is well then scoop it and spread it on top of your pie.  The final flourish is about a handful of shredded coconut.  (You can toast it first if you want but for me that usually turns into burnt coconut so I don't even bother.) 


Voila!  Delicious coconut cream pie!

Adi


Wednesday, December 17, 2014

Countdown to Christmas

So, funny story about this project...I'd had it pinned on Pinterest for several years and never got around to making it.  When I was at Michael's earlier this year I saw that decorative chargers were on sale and made an impulse buy because, well, it was pretty and like, a dollar fifty.  I picked up a red one and a bottle of chalkboard paint and settled in the craft room to get down to finally making it.  I wiped off the charger with a wet towel, let it dry, and put on a coat of chalkboard paint following the instructions on the bottle (brush on a coat horizontally and then another one vertically).  I set it aside for a couple of days to dry while I unpacked my Christmas stuff.

As I was unpacking I opened a box and found THE SAME CHARGER, only purple instead of red.  Apparently I bought it after Christmas last year with the intention of making it this year.  I mean, it was the SAME CHARGER--detailed scalloped edges and everything.  My best friend and I had decided to scale back our gift-giving but I was still looking for something a little more for her present.  Since she and her husband graduated from TCU (go Frogs!) I knew their theme was purple so I made it for her.

I think two coats covered the chargers nicely, and by that I mean two times going up and down as well as side to side for the most even coverage.  I let them dry for 24 hours (minimum) between coats as well as between the last coat and the writing.  The paint said to cover the surface with chalk to "condition" the dried paint so I did that and then cleaned it all off.  Using chalkboard marker (paint pen would work, too!) I wrote a semi-permanent message on it with the intention of updating the count each day in plain old chalk.  The last step is to make a BIG bow and hot glue it to the top.  I'm a fan of the jaunty side bow:


I just realized my handwriting is much straighter on hers than on mine, haha!  Oh well. 

If you're giving this as a gift allow yourself a few days for drying time--a minimum of three full days.  I wrapped a little plate/frame stand and a plastic bag with a couple of pieces of chalk in it and that's what I gave to her first.  She was (understandably) confused until I pulled out the charger.  I didn't wrap it because I didn't want to squish the bow, but if you do need to wrap it a bag would probably be best. 

Have fun!

Adi

Sunday, December 14, 2014

Make Your Own Granola

Here's another easy gift idea:  jars of your own homemade granola!  I've been making mine own for the last 6 months or so and there are so many flavor combinations.  I got the inspiration for this flavor from another website but added my own spin to it.  Let's get started!


You will need:
-2 really ripe bananas
-5 cups of oats
-peanut butter (either kind, crunchy or smooth)
-cinnamon
-nutmeg
-vanilla
-honey
-salt
-other mix-ins such as chocolate chips, dried fruit, or slivered almonds

Preheat the oven to 300 degrees.  Start by mixing the dry stuff. 


You'll want to add about 2 teaspoons of cinnamon and half a teaspoon each of nutmeg and salt.  Add the cinnamon/nutmeg/salt combo to your oats and your other chosen mix-ins (I usually do almonds but I was out of them that do so chocolate chips it was!).

Next, mash the bananas and add a tablespoon of vanilla, half a cup of peanut butter, and a quarter cup of honey. 


Combine the wet and dry ingredients:


 Stir to mix them and spread the mixture over a large cookie sheet (sprayed or oiled so it won't stick).


Bake for 15 minutes and stir. 


Bake for 15 more minutes and stir again.

 
I found that it took 15 more minutes (45 total).  You'll want the top and edges to start to brown but don't let it get too dark.  I like to give it one more stir before leaving it to cool.  You can leave it in large chunks or crush it up into small pieces.  Put it into a treat bag or a mason jar and you've got a (fairly) healthy, homemade treat to give this season (or keep for yourself--it's great in some Greek yogurt)!
 
Adi
 

Tuesday, December 9, 2014

Christmas Light Flight

My father-in-law had a great opportunity to go on the flight and could bring one other person.  Lucky for me:  the other (local) family members did not want to go!  We got on the flight list for last night and off we went.

Now I love driving around to look at Christmas lights, but Christmas lights on a plane?  Sign me up!


Look at the cool nose art on this C47!

 
The cockpit:
 
They invited WWII vets to sign the plane and we were lucky enough to have one join us that night!  (He was 90!)  The messages around the plane were so neat. 

 
Here we go!
  
 
A few shots of downtown Fort Worth:


I may have gotten in trouble for having the flash on but those were the best pictures.  (I promise I did not even realize it!  I was just trying to get good pictures and the best were on sports mode!)  Maybe if I took the time to learn more about my camera I could have gotten some good pictures WITHOUT the flash.

It was a cool opportunity and I'm so thankful I got to go!  Here's a link to the Great Generation Aircraft website in case you're interested in touring Fort Worth from above.  We had a blast!

 
Adi

Sunday, December 7, 2014

3 Easy Christmas Food Gift Ideas

Soooo...I have misplaced my camera charger.  My camera is completely dead and that yummy granola making process I was going to post will have to wait until I find the charger and revive my poor, dead camera.  In the meantime, let's talk homemade Christmas goodies!

1) Sprinkle Pretzels
*click on the title to see the instructions!*


*click on the title to see the instructions!*
 
 
3) Peppermint Fudge
*The instructions are on the jar of Marshmallow Fluff.  I just added a teaspoon of peppermint extract and then topped it with crushed candy canes before it cooled.*


Wednesday, December 3, 2014

Let there be (more) light!

I saw a project on Pinterest that promised to triple the light coming from my Christmas tree.  It looked easy enough so I gave it a try.  


Start with 6 inch strips of ribbon that match your decor.  Pick up a couple of packages of tiny craft mirrors (mine had 25 per bag).  The last things you'll need are a hot glue gun and extra glue sticks.  
 

Put a dab of glue on the back of one of the mirrors.  Press the ribbon onto it: 


And put another dab of glue on top of that:

 
Quickly press another mirror piece into the glue so you have an ornament with mirrors on either side.  


I made 25 of these mini medals.  


Here's the before:


 And after:


I think "three times the sparkle!" is over exaggerating a bit but when strategically placed deep in the tree next to lights the shine is definitely increased.  I think this one was worth it.  Easy enough!

Adi